One major reason when out shooting seascape photography is finding the right composition. We've heard it time and time again to vary your shooting height, but also think about constantly looking through your view finder. What may look great with your eyes may look flat and boring once captured in a flat image.
Leading lines will give the viewers eyes to transition through the image providing the overall viewing pleasure and not allowing the viewers eyes to get stuck on one particular subject.
Focus is very important and often over-looked, your focus should be on the foreground and give enough detail up close to the most interest. I personally use hyperfocal distance to optimize important details throughout my seascape photography. I have found autofocus spotty and has led to much disappointment once viewed on a larger screen.
The contrast of light should be a consideration for your foreground, shadows and light can also help provide effective leading lines especially when working with sunrise and sunset seascape images.
Motion and knowing what shutter speed will provide the effect you are looking for is very important, this will take practice varying your ISO to increase or decrease your shutter speed. Your shutter speed will also depend on the current and motion of water, water without much drama is best captured with a longer exposure flattening out reflections caused by small waves or ripples.
Cloud cover is something we look for when shooting seascape photography and if conditions permit can offer leading lines from top of the image.
Although there are so many useful tools in post processing, I find that using on camera filters such as neutral density, graduated neutral density and reverse neutral density filters very important in obtaining the best possible in-camera effect for seascape photography. There is no replacing neutral density filter used for motion in post processing other than to provide a complete blur in Photoshop.
Shoot a wide lens to gather a large foreground area, I find most of my compositions are captured between 12mm to 18mm. I also find the most widely used aperture is f/8 combined with a variety of neutral density filters to optimize my proper intended shutter speed based on the conditions I'm shooting.
Do your research and scout your locations before hand, making notes of potential compositions for future seascape photography adventures. When shooting seascape photography I find that low tide provides a better opportunity for interesting rock formations and tidal pools, there are a variety of internet sites that can provide you tide information as well as sunrise and sunset times. These two factors will optimize your chances for a more effective and productive seascape photography.
Ed King is a Rhode Island based seascape photographer spending much of his time capturing the Rhode Island and New England coastline offering fine art prints of the dramatic New England coast.
Showing posts with label photo tips. Show all posts
Friday, December 25, 2015
Thursday, September 18, 2014
Creative Autumn Photography Tips
Autumn is my favorite season to photograph. The first piece of foliage signals the beginning of an ethereal journey through nature as I watch it transform into vibrant hues of red, orange, and gold. Scenes that I have become familiar with morph into a mosaic of colors and tones, and the cooler air and unsettled weather contribute to the creation of a dreamscape playground.
Since autumn photography is a personal pursuit of mine, I wanted to create a list of fall foliage tips to help you navigate through this otherworldly season and harness your creative expression. read more
Monday, September 8, 2014
How To Shoot Dreamy Backlit Photos With Natural Light Tutorial
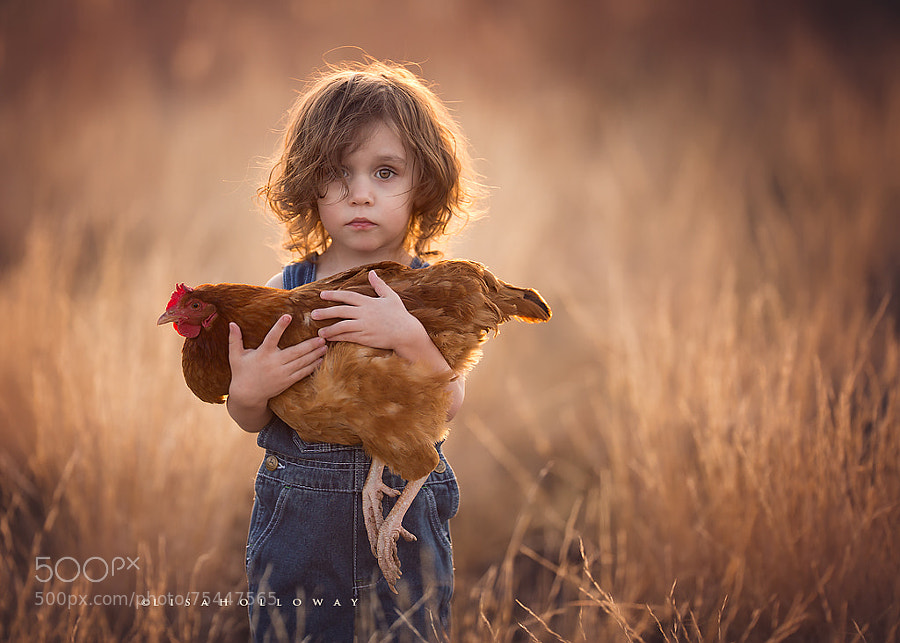
Lisa Holloway is an internationally-published, award-winning fine art portrait photographer from rural Northwestern Arizona. A Canon girl since Day One, Lisa is self-taught and works exclusively with natural light. She has been in the portraiture business, photographing clients in the Las Vegas metro area since 2008. When Lisa is not pursuing her photography interests, she loves the outdoors, road trips, cooking, thunderstorms, and spending time with her husband and 10 children.
In this tutorial, Lisa will demonstrate how she created backlight with natural light for capturing dreamy portraits outdoors. Plus, she shares her expert tips on how to photograph and connect with children as subjects. Read on and get inspired!
Beautiful light, a genuine connection, and a glimpse into the soul—these are the 3 things I strive to capture in my photography. Even the most ordinary scene can be transformed into something magical when infused with vibrant colors, stunning natural light, and a truthful connection with your subject. Read more
Saturday, July 12, 2014
Step by Step Tutorial for Long exposure photography tutorial
Long-exposure photography or time-exposure photography involves using a long-duration shutter speed to sharply capture the stationary elements of images while blurring, smearing, or obscuring the moving elements. The paths of moving light sources become clearly visible.
Step by step guide to controlling the amount of blur and abstraction you can create in your shots. Made using basic equipment.
Sunday, November 17, 2013
Best Free Online Photo Editing tools
Given the modern cameras we have today, photography has become quite convenient these days; even the most basic of the models produce clear and crisp photos. However, issues regarding lighting, red-eye, while balance etc. keep cropping up even now. And it is exactly then that you feel the need of photo editing services. However, you may also choose to use the free image-editing software available online. But, you do not know which one to choose.
| GIMP |
Firstly, if you can afford, you should obviously go for Photoshop, the effectiveness of the program is known to all and sundry. However, if you cannot afford to do that, you need not be disheartened as there are several other free tools for getting the edits done. Some of them are discussed below:
Gimp
GNU Image Manipulation Program or Gimp was introduced in the year 1996. It has always kept itself updated since then, the result of which is that the software is one of the most powerful free photo editors that you can find on the internet.
It contains tools that can enhance contrast, correct colors, work on brightness etc. It can also blur or sharpen images, remove red-eye, fix perspective problems, add special lighting effects, create an animation or turn the photo into an oil painting. The paint tools here are pretty amazing that support full layer and several ways for extending the program.
Given the various factors that Gimp involves, it takes some time to learn the program. However, if you have any previous experience of image-editing, you can be doing some meaningful work in a few minutes.
Paint.NET
It may not be as powerful as Gimp, but that doesn't mean that you cannot like it. Paint.NET is strong on image editing basics, with several rotating and resizing options for the images, a good range of paint tools and selection, and some great special effects as well. However, the best thing about Paint.NET is its straightforward interface, which makes it extremely user-friendly to even a graphics novice.
PhoXo
It has been around for about 10 years, and has grown into a very useful program in all these years. In fact, PhoXo can be used by everybody. While children can play around with the clipkart, customizing the photos with cartoon cats, grown-ups can use its various other tools, like paint and drawing, effects, image transformation tools etc.
Funny Photo Maker
This software has no layer support or paint and drawing options or smart selection tools, but is popular among photo editing services because of its amazing range of effects that you can apply in seconds. This helps them add someone's face to an actor's poster or even a currency note; add snow and rain to a photo; turn a still image into an animated one; turn your image into a school or college; apply frames, etc.
Photo Pos Pro
Its dated interface and small toolbars may not look so promising, but once you begin exploring it, you start liking it. It has a wide range of paint tools, selection options and color correction tools. It offers reasonable support for masks and layers, a whole lot of effects, and scripting tools that help you automate several editing tools.
Photo editing services use all the software that have been discussed here; choose the ones you like and get going with editing your photos.
Wednesday, October 30, 2013
How to Take Pictures in Tips for Low Light Conditions
Much more than random clicks and going around with your camera hanging around your neck, photography is an art. Perhaps, one of the toughest forms of art, photography, to a great extent is dependent on external components like light and shade to be perfect.
With new technologically advanced cameras making rounds in the market, photography has become as easy as a click of the shutter. However, photographers who are passionate and take this art form seriously need to know the magic of light and shadow. Because, cameras work in the light, it's always been a challenge to take good photos during the night-time.
Tips for Low Light Conditions
Night time offers brilliant photographic moments. The sky, the stars, planets and the nature come together as a delightful photographic moment. However, the poor light conditions make the photographs look grainy and odd colored. With advanced hardware for cameras, it has become quite easy for the photographers to click quality photos even in the dark!
Here are some photography tips to help you shoot in the dark.
ISO: When shooting in low light or dark conditions, using a higher ISO somewhere around 800 to 6400 is a good idea.
Use larger lenses: Large aperture lenses work quite well in dark conditions. Large lenses with 35mm f/1.8 or 50mm f/1.8 features can be very effective in low light conditions. However, one has to remember, while using these lenses the ISO level needs to be low. Somewhere around 400-1600 is sufficient. This also keeps the focus on the subject hence, blurring the background and surroundings. This creates an amazing effect for photos.
Successive Drive: Taking photographs is a row in the dark can get you that one perfect photo you've been waiting for. You have to enable the drive mode available in the menu.
Use Tripod: Ideal for outdoor and indoor shoots that involves stationary subjects, tripods are the perfect aperture to shoot at night. This helps you to avoid blurry photos. Try and avoid using it for moving subjects.
Use Flash: Needless of saying, without flash, you cannot shoot at night or low light conditions. Flash is a must for night-time photographs. Flash illuminates the subject of photograph and makes the photo bright. For outdoor shoots, use external flash. While shooting indoors, focus the flash to the ceiling to reflect the light on the subject therefore, illuminating it with a soft light.
Grab the moment: There is no point in hurrying when it comes to photography. Wait for the right moment to get the best click. It's advised to let the subject settle down for sometime before you shoot it. This ensures you have the best quality click.
Source of Light: Even during the night-time or in low light conditions, it's important the subject faces the major source of light. The light needs to fall on the subject evenly. You can also use reflectors to reflect the light on the subject's face.
Aperture Priority mode: For low light conditions, use the smaller aperture value like f/3.5 or smaller. This helps the lens to open up more thus, making the photo brighter.
Tuesday, October 29, 2013
How to buy a compact point and shoot digital camera
Point-and-shoot cameras are specially designed for amateur and holiday photographers who want to capture incredible pictures, but don't want to get into the technical details. With a compact size, easy-to-use interface and incredible performance, these digital cameras perfectly fit the bill.
The 5 important features you should check out for before buying a digital camera are:
1. Size
Point and shoots are small and compactly designed and neatly fit into the palm of your hand. If you want to choose a lighter one, then you may have to give up on some features. So, cross check the features available with the size as well as your comfort level before you choose a particular model.
2. Battery Backup
If you're going to be doing most of your photographing when you're on a trip or on a holiday, then you definitely have to check out how much backup the batteries will provide. Digital cameras may come with either AA lithium-ion batteries or the rechargeable ones.
3. LCD Display
The LCD display is the screen you see at the back of the camera. It is on this screen that you will be composing images and viewing the photographs you click. The screen should be relatively large enough (minimum 2.5") for comfortable viewing. The higher the screen resolution, the better will be the image clarity.
4. Technical Features
There are some basic "camera" terms such as ISO, shutter, zoom and resolution you should know to get the most from your digital camera. An optical zoom is a better option than a digital one, especially if you are going for higher-end zooms. Optical-zoom cameras generally come equipped with optical image stabilizer to ensure blur-free shots. The focal length of the lens is another factor you should consider. A minimum of 28mm focal length gives a reasonable performance. Point and shoots also come with many preset modes to help you choose the correct settings to match the lighting conditions. Some cameras have features such as face recognition and red eye reduction to help you click the perfect portrait each time.
5. Videos
Most models of digital cameras have a video option. Though the video quality may not be up to par, it's quite reasonable for a compact camera. Most point and shoots let you capture videos at 320-by-240 and/or 640-by-480 resolutions.
Saturday, August 31, 2013
How to take Landscape Photos at Twilight
There are various phases of sunrise and sunset, however each phase repeats itself twice a day - once during sunrise and once again at sunset. All phases during sunrise are the same for sunset phases - the only difference is chronological order i.e. when each phase begins and ends. Therefore, sunrise and sunset are exactly the same, except that sunset reverses the order of phases seen at sunrise. For sunrise, the order is: astronomical twilight, nautical twilight, civil twilight, sunrise. If we reverse the order we get the sunset phases: sunset, civil twilight, nautical twilight, astronomical twilight. Let's begin with sunrise and discuss each phase separately.
The length of twilight before sunrise and after sunse
t is heavily influenced by the latitude of the observer; therefore I will not discuss the length of each twilight phase since it is highly variable. The first phase of morning twilight is known as astronomical twilight. This period of twilight occurs when the center of the sun is between 12° and 18° degrees below the horizon and slowly increases before day time officially begins. Most casual observers would consider the entire sky already fully dark even when astronomical twilight is just ending in the morning. Atmospheric colors consist of deep dark blue toward the horizon, and completely black when facing west. Astronomical twilight really brings cityscape photos to life. The deep blue mixed with warm artificial lights from city buildings, streets, and cars produce nice contrasts. Arguably, this is the best time to photograph cityscapes, but this clearly depends what you're attempting to capture. Images during all twilight phases and during sunrise require a tripod. The photo will be blurry, regardless if your camera lens has vibration reduction or image stabilization.
Nautical twilight is when the center of the sun is between 6° and 12° below the horizon. The primary color cast across the atmosphere is usually a deep blue hue with noticeable orange and yellow tones at the horizon due to the rising sun. Light will begin appearing quickly throughout this phase, and the blue sky will get begin to get brighter and paler. Details will become easier to distinguish but will lack most edge definition. Again, cityscape photographs are nicely produced during this phase. Most landscape photographs will be uninteresting during this phase because there is not enough available light. Silhouettes begin to look interesting, and get better in the next twilight phase.
Civil twilight is the brightest phase of twilight and begins when the geometric center of the sun is 6° below the horizon and ends at 0° sunrise/sunset. The horizon is clearly visible and shadows are easily discernable. Objects are clearly defined and no additional light is needed in most cases. The light cast during this phase can be anywhere from warm golden tones to cool pink tones. During civil twilight, the colors of the sky are going to change quickly. Colors of pale yellow, neon red, and bright orange will dominate the sky. If clouds are present they begin changing colors, first from soft pink then to deep ruby red. When looking westward you can see the twilight wedge, which is a mixture of Earth's shadow and scattered light. The pink and blue hues of the twilight wedge are separated by multiple layers. Most landscape photos begin coming to life as available light increases and details become obvious.
When the sun finally rises, deep ruby red and dark pink colors splash all over the terrain. Shadows come alive and retain purple and blue hues due to scattered light. The contrasts of red and blue are at a pinnacle, and will arguably provide for the best landscape pictures. The mixture of colors and shadows helps distinguish form, shape, and texture, and these compositional elements should be utilized. The color of light is quickly changing from red to yellow, and you must react very fast if you decide to change composition or frame. As the sun continues to rise in the sky, colors shift from yellow to white. This is why the first hour of sunrise and sunset is called the "golden hour", because red light shifts to gold. After the first hour of sunrise the color of light begins turning whiter and is not conducive to most landscape photography. The only circumstances that could create gorgeous photos in midday are during storms when the sun breaks through high clouds illuminating spots of land. Otherwise, forget about taking good landscape pictures - they will not be compelling.
The best time of day to create evocative landscape imagery is during twilight and sunrise/sunset. There are rare exceptions when these "rules" do not apply, which is why if you are seriously considering landscape photography you must be out in the wilderness during these hours. Yes you will miss breakfast and dinner, yes it will be hard waking up very early in the morning, and yes you will be frustrated many times when the photo opportunities are just not there because it's too cloudy, or no clouds, etc. But who ever said photography was easy? This stuff is not meant for the meek. As with anything in life you have to really want it. You have to be passionate about taking away a beautiful photo, even though it took many visits to the same spot to get your photo. This stuff can be grueling at times, but for me, the rewards far outweigh the repeated disappointments. I hope this article has helped those seeking to become landscape photographers.
Please visit my website for compelling landscape photographs to witness some of the phenomena I have described above. http://www.stefanhoferphotography.com
Wednesday, July 31, 2013
How to take photos with DSLR Camera
Stop using the Auto setting on your fancy DSLR camera! “Master Your DSLR Camera” is a how-to book featuring photojournalist and Pulitzer finalist Mary F. Calvert in video tutorials. It also includes 30 slideshows and guided tours that let you easily navigate your way through photography jargon, camera settings, and dozens of common shooting scenarios. This Betterbook enhanced e-book covers everything so you won't miss capturing even one more priceless moment.
\Without this book I never would have discovered 75% of the settings on my Canon Rebel T3i. What a waste that would've been! Not only is this book packed with information, but it is extremely accessible for complete amateurs. Overall, an extremely handy addition to my library.
USA TODAY—“Designed for beginners, the language is fun and easy to follow... ‘Master Your DSLR Camera’ is an invaluable companion for amateur photographers looking to get more out of their gear.”
THE WALL STREET JOURNAL—“Interactive iPad book brings DSLR camera lessons to life... the slickly designed book includes material like videos, tours, slideshows and cheat sheets for common shooting scenarios.”
Sunday, July 28, 2013
Best 5 Free Photography Apps for iPhone
Do you own an iPhone? Did you know that the camera of the Apple iPhone is designed in a way that has increased the ability to capture images with an extra ordinary quality? iPhone cameras have become the most widely used tools on the planet Earth to take pictures and share them online with a universe. Before sharing the images, people love to edit them. For editing hundreds of paid and free photography apps are available to enhance the digital photos. You can use tools in these apps to enhance the beauty of your photos with thousands of effects.
Many of the best smart-phone photography apps are exclusively available for iPhones. Yes! You read it right, exclusively and totally free. This article will tell you about the top 5 iPhone photo apps which help you to create photos that everyone would going to love.
1. PIXLR-O-MATIC - Edit Images Quickly
This is very easy to use iPhone photo app and with the help of it, you can apply a number of filters, frames, and effects to your images quickly. If you love photography with your iPhone camera or enjoy editing photos artfully, just download this app, you are going to love it.
2. PHOTOBUCKET
Shoot memorable moments of your life with this great iPhone photography app and directly upload them on Photobucket. You can also share them on a number of social websites. Download pictures that you like from photo galleries to use as wallpapers. If your internet signals are slow, don't worry, you can easily pause uploading your photo and resume when the signals are strong.
3. ADOBE PHOTOSHOP EXPRESS - Express With Your Photos
Who haven't heard of Adobe Photoshop? This is the most used desktop photo editing tool worldwide. Adobe Photoshop Express is its basic and handy version for smart-phones. It has all the basic editing tools, filters, and frames that are required to enhance your photos before sharing them with friends and family.
4. BEFUNKY PHOTO EDITOR - Just Save The Photos
With wonderful and unique effects, frames and editing tools, this iPhone photo app is one of the most popular apps. You can easily make major or minor adjustments to your images, and apply tons of free effects to transform them completely. Undoing the editing is not a problem in this application. Photos can be easily shared through Facebook, twitter etc. If you don't want to share your edited image to anyone, just save it to your iPhone.
5. DOODLE BOOTH - Make Doodles As you Draw
By using this iPhone photo app you will discover a really fun way to edit your photos. You can add doodle stickers to your photos that will look like you have drawn them with a pen. Images can be imported from Facebook or photo gallery of your mobile. With its upgraded version, you can share high resolution images, and guess what?? This version is also compatible with your iPhone 5.
All the photography apps mentioned in this article are totally free of cost. Feel free to download them and start having fun. Cheers!
Sunday, June 30, 2013
How to take good digital photos
Do you want to learn how to take good photos?
Taking good quality images is pretty easy. Some easy tips and techniques can easily help you out.
Get Closer
Moving in closer to the subject can make your photos much better looking. The reason is because when you move closer your photo gets much more focused and simple.
Simplicity
As stated above, simple photos are better. Simple shots are easy to understand and make the viewer instantly understand what is the main subject of interest. Complex photos are hard to understand and the viewer is left confused. If the viewer has to question what he or she is supposed to look at then the photo is too confusing and complex. For example, try taking a photo of one flower close instead of hundreds of flowers all cluttered.
Leading Lines
Lines are really powerful to use in photography. The lines can be used to lead to the subject of interest. For example, instead of taking a photo of a person standing with a wall behind them move the person so that the wall is leading towards them instead.
Another way to use lines is to create different moods and emotions. Vertical lines generally represent motion and action. Think of the pictures of tall skyscrapers or rockets flying in the air.
Then there are horizontal lines. Sunsets and landscape photos usually have horizontal lines and they are very tranquil and peaceful looking. The ocean also has those types of lines. Then the crashing waves are vertical and filled with motion.
Al Sanez has a Free Video that shows you how to learn digital photography tips
Subscribe to:
Posts (Atom)